Here's what you need to know
about any transport category
Turbojet Aircraft

Examples below pertain to Lear 35


CRM  |  Takeoff Performance  |  Indicators  |  Emergency Procedures  |  Limitations  |  Approach Planning
                                                                                             

CRM: index You can simplify CRM by remembering:

Asking questions enhances the communication flow:

and

making it easy to understand, by dividing CRM into 2 processes:

1- The Communication Process
and
2- The Decision Making Process

The communication process involves:
(a) soliciting and giving feedback; (b) listening carefully; (c) focusing on behavior, not people; (d) maintaining focus on the goal, and; (e) verifying that the operational outcome is achieved
The decision making process involves: (a) identifying the problem; (b) considering appropriate SOP's; (c) thinking beyond the obvious alternatives; (d) making decisions as a result of the process; and (e) resisting the temptation to make an immediate decision, and then support it with facts.
 
Takeoff Performance index

4 Segments

For the first segment, (from 35' to gear retraction) the climb segment gradient required for two-engine turbine-powered aircraft with one engine inoperative is a positive rate of climb;

For the second segment, (from gear retraction to at least 400' above runway) a climb gradient of not less than 2.4% is required;

For the third segment, (acceleration to engine inoperative en route climb speed, the transition segment,) a climb gradient of not less than 1.2 % is required.

The fourth segment is the engine inoperative climb to the enroute altitude.

 
The first segment begins just after lift-off at 35 feet, and continues (with one engine inoperative,) until the landing gear is retracted.

The second segment
begins when the landing gear is fully retracted and continues until the airplane reaches an altitude of at least 400' above the runway (with an inoperative engine.) The second segment is flown at V2 and must have a gradient of at least 2.4% .

The final segment (sometimes sub-divided into third and fourth) begins when transition to the enroute configuration is accomplished, meaning the flaps and gear are up, or 1500 feet, whichever is higher.

 
The takeoff flight path profile will vary during the transition segment depending upon obstacle location and height. Obstacle clearance may require the climb be made in the second segment configuration (gear up, flaps at takeoff setting, and takeoff power). On the other hand, without any obstacles the transition segment may start at 400'  

Climb Gradient Calculations

The method of calculating climb performance during the various climb flight path segments is a percentage of the horizontal distance traveled with zero wind. For example, if a 3.0% climb gradient is required, for every 1,000' the airplane travels horizontally it must climb 30'.


Engine Failure at, below or above V1

Unlike a light twin engine piston aircraft, in a light jet, consider a takeoff mandatory for an engine failure recognized after V1, unless the runway exceeds the runway length required-by at least 50%. Of course, always follow the manufacturer’s memory items for the make and model. If for example, the engine failure occurs before the decision speed is reached, the takeoff must be aborted. If the engine failure occurs after the decision speed is reached, the takeoff must be continued. Here is an excerpt from the emergency checklist of a Lear 35.

 
Engine Failure During Takeoff Below V1 (Lear 35)
1. Thrust Levers IDLE
2. Wheel Brakes APPLY
3. Spoilers EXTEND (T/R or D/C Deploy if Necessary)
 
 
Engine Failure During Takeoff Above V1 (Lear 35)
1. Rudder & Ailerons AS REQ’D
2. Accelerate to Vr Keep nose wheel on Runway
3. Rotate at Vr; Climb at V2
4. Positive Rate GEAR UP
5. Clear of Obstacles V2+30 FLAPS UP


If the takeoff is continued, the airplane will yaw toward the failed engine. Use whatever rudder is necessary to maintain directional control and keep the wings level with the controls.


The rotation to takeoff attitude at VR should be accomplished in exactly the same manner as in the normal all-engine takeoff. At lift-off, due to asymmetric thrust, the rudder and aileron must be used smoothly to avoid rolling and yawing tendencies. As the nose comes up to the normal climb angle and you no longer have a good visual reference for directional control, the DG or flight director will become the primary instrument for bank. Hold your heading within 5 degrees. By holding the ball in the center with rudder smoothly applied and maintain your heading and directional control by using slight bank angles. The rudder and aileron control forces required to maintain direction in most airplanes need not be trimmed out immediately. As soon as the engine loss is noted, call out the failure and then take no further action except to fly the airplane until the takeoff is accomplished.

 
With an engine failure above V1 just take your time, and fly the airplane. As PIC, command what you want done one step at a time. When the immediate-action items have been accomplished, take no further action until after the second-segment climb is accomplished and accelerate to engine-out en route climb speed. Maintain the obstacle-clearance altitude as you accelerate and retract the flaps on a normal speed schedule. Make whatever pitch change is necessary to compensate for the flaps and hold the altitude smoothly. Maintain obstacle clearance or acceleration altitude, until engine-out en route speed is reached. Monitor the engine thrust setting to avoid exceeding the limitations. Call for the "engine-failure checklist" followed by the "climb checklist" 

Consider where to land, dumping fuel if necessary. Obtain a clearance to a takeoff alternate if the departure is below minimums.
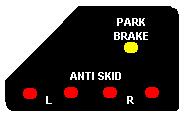
 
   
Indicators index

Besides flying the airplane, you have to have a thorough knowledge of aircraft systems. Knowing what each and every indicator means is absolutely essential. The meaning of these indicators must be memorized. Learning what the indicators signify is the start of thoroughly learning about aircraft systems.

There are really only three things that you absolutely must know by memory, in order to understand an airplane that is new to you. It does not matter what type of aircraft it is, from ulralight  to heavy jet, the three things you absolutely must know, and explain without hesitation are:

1- The meaning of each Indicator;

2- All of the Limitations;

and

3- Each Emergency Procedure Memory Item.


Here are some of the panel indicators, and what they are telling you. (Lear 35)


One or both current limiters failed. Check Voltmeter Battery Voltage=Both CL's Failed.

Fuel below 400 - 500 pounds in either tank.

Less than .25 psi fuel pressure to engine. Light extinguishes at 1 psi.
A low fuel pressure switch is located between the fuel shutoff valve and the engine-driven fuel pump in 
each engine feed line. The light extinguishes when pressure increases above 1.0 psi. 
Illumination of a FUEL PRESS warning light is an indication of loss of fuel pressure to the 
engine. The probable cause is failure of the affected wing jet pump. The engine-driven pump is
capable of suction-feeding enough fuel to sustain engine operation without either the wing standby
pump or jet pump. However, 25,000 feet is the highest altitude at which continuous operation should
be attempted in this event. Memory items: Thrust Lever Retard, Standby Pump On, Air Ignition On.

or (FC530) Steady- Spoilers not locked down. Flashing-Spoilers deployed with 13 degrees
                                                     or more flaps extended. 

Electric door hook not fully retracted, or one of 10 latch pins not fully engaged. 

Either: 1- Spoilers split 6 degrees or more, or 2- Spoiler and aileron split 6 degrees or more
              in spoileron mode. 

or Either: 1- One or both Pitot Heaters is inoperative with the switches on,
                                        or 2- One or both Pitot Heat switches is off. 


A fuel filter is installed in each engine feed line to filter the fuel before it enters the engine-driven 
fuel pump. Should the filters become clogged, the fuel is allowed to bypass them. A differential pressure 
switch installed in each filter assembly illuminates the one amber FUEL FILTER annunciator light if either 
or both filters are bypassing fuel (Annunciator Panel section).

Either: 1- Switch is off and valve is open, or 2- Switch is on with insufficient pressure, or
                             failure of valves to open.

Either: 1- Switch is off, or 2- Computer has failed with the switch on.  

Steady: System is off or failed. (During pusher actuation it is normal)
                             Flashing: In shaker range.

Vertical gyro has failed.

System inoperative above .69 Mach with autopilot off. Overspeed warning sounds above .74 Mach.

L or right NAC Heat switches are on.

  Inverter is off line.

  Inverter is off line.

Inverter has failed with the switch on. 

Oil pressure in one or both engines is below 23 psi.

Stabilizer structure is too hot.

Windshield heat has been shut off by a temperature limit.

Nosewheel Steering is engaged.

Pylon or Duct temperature too hot. Both lights on: Manifold overpressure (some SN's.)  

Generator is off line.

(SN > 113) Cabin altitude has reached 8750 feet and controller has switched to manual mode.
(SN >113) 
At 9,500 the Emergency Pressurization Valves are activated, directing engine bleed air directly into the cabin. 
At 10,100 the cabin altitude warning horn sounds.
At 11,500 the cabin altitude limiters actuate. 
At 14,000 the passenger oxygen masks deploy and cabin overhead lights illuminate.
Diff Press for relief of the outflow valve is 8.9. Diff Press relief for the safety valve is 9.2.

(SN < 113)
|At 10,000 the controller has switched to manual mode. 
At 11,500 the cabin altitude limiters actuate. 
At 14,000 the passenger oxygen masks deploy and cabin overhead lights illuminate.
Diff Press for relief of the outflow valve is 8.9. Diff Press relief for the safety valve is 9.2.

Cabin Alt 10,000’ Warning Memory Items

(Emergency Descent)
1. Crew Oxygen Masks DON & Select 100%
2. Thrust levers IDLE
3. Autopilot DISENGAGE
4. Spoilers EXTEND
5. Landing Gear (below Mmo or Vle) DOWN
6. Descend at Mmo/Vle but not below MSA
7. PASS OXY Valve NORMAL
8. PASS MASK Valve MAN
 

Wing Structure temperature too hot.

Windshield anti-ice valve is open.

Alcohol tank is empty. (Early: System pressure is low.)

One or both battery temps are as indicated or higher.

Engine sync switch is on with nose gear down and locked.

Aircraft is on the ground and horizontal stabilizer is not trimmed for takeoff.

Wheel Master Switch is depressed, Primary pitch trim has a fault (potential runaway) or 
                    Primary pitch trim is running at fast speed with flaps up.

Illuminates whenever a Red Annunciator Illuminates. 

Ferrous metal particles have been detected in the engine oil. 

System Pressure 1,125 pounds or less. 

A green or amber FUEL XFLO annunciator light (Annunciator Panel section) 
on the glareshield illuminates continuously whenever the crossflow valve is fully open.

If wing fuel imbalance occurs, as in single-engine operation, crossflow is accomplished by opening the 
crossflow valve and turning on the standby pump in the heavy wing, while ensuring that the opposite 
standby pump is off. The transfer rate is approximately 50 pounds of fuel per minute.

With both engines operating, opening the crossflow valve to balance fuel should not be attempted when a 
red FUEL PRESS light is illuminated unless it can be accomplished below 25,000 feet. To do so would divert 
pressure from the affected engine-driven pump to the crossflow line. Instead, asymmetric power settings 
may be used to balance fuel, if necessary. The above considerations do not apply to single-engine 
operations, and normal cross-flow operations may be performed as usual. 

Indicated engine oil pressure is low. 

Fire or overheat is detected in the associated engine. Handle shuts off Fuel,
Bleed Air, Hydraulic, and arms both bottles. 
Memory Items:
1. Thrust Lever IDLE UNLESS CRITICAL THRUST SITUATION
2. If fire continues more than 15 seconds or there are other indications of fire:
a. Thrust Lever CUTOFF
b. Engine Fire Pull Handle PULL
c. ARMED Light DEPRESS ONE
 

Fire Extinguisher System is Armed. Depressing an illuminated ARMED Light
Discharges the contents of one fire extinguisher bottle into the affected engine nacelle.   

  Illumination of any red anti skid lights indicates a malfunction.
For anti-skid to work, Switch must be on, Both squat switches must be in the ground mode,
Parking brake must be released, and Taxi speed must be greater than 10 Kts.


 Illumination of both Red Main Gear Unsafe Light indicates
Main Gear Inboard Doors are not fully closed. After Manual gear extension, both L & R Unsafe lights
remain illuminated.


Emergency Procedures  (Specific to Lear 35) index

These are specific to certain problems that may arise, and each procedure listed must be memorized and performed in sequence, then reference may be made to the emergency checklist for the remainder of the procedure. In addition to the memory items, the following steps are considered part of all emergency situations:
1- Maintain Aircraft Control
2- Analyze the Situation
3- Take Proper Action

 
Aborted Takeoff  
Cabin Altitude 10,000' Warning  
Engine Failure During Takeoff Below V1  
Engine Failure During Takeoff Above V1  
Engine Failure During Approach  
Engine Fire - Shutdown  
Pitch Axis Malfunction  
Cabin / Cockpit Fire, Smoke or Fumes  
Emergency Braking  
Emergency Evacuation  
Fuel Pressure Light  
Overspeed Warning / Recovery  
Roll or Yaw Axis Malfunction  
Stall Warning Activates  
Thrust Reverser Deployment / Takeoff Below V1  
Thrust Reverser Deployment / Takeoff Above V1 Aeronca  
Thrust Reverser Deployment / Takeoff AboveV1 TR 4000  
Aborted Takeoff list
1. Thrust Levers IDLE
2. Wheel Brakes APPLY
3. Spoilers EXTENDED


Cabin Alt 10,000’ Warning list
(Emergency Descent)
1. Crew Oxygen Masks DON & Select 100%
2. Thrust levers IDLE
3. Autopilot DISENGAGE
4. Spoilers EXTEND
5. Landing Gear (below Mmo or Vle) DOWN
6. Descend at Mmo/Vle but not below MSA
7. PASS OXY Valve NORMAL
8. PASS MASK Valve MAN


Cabin/Cockpit Fire, Smoke or Fumes list
1. Crew Oxygen Masks DON & SELECT 100%
2. Smoke Goggles DON IF AVAILABLE
3. Passenger Oxygen Masks DEPLOY
4. OXY-MIC Switches ON
5. If source is not immediately known - Land as soon as possible
If source is known - Extinguish fire or eliminate smoke or fumes
If it cannot be verified fire is out - Land as soon as possible
If fire is out - Land as soon as practical


Emergency Braking list
1. Emergency Brake Handle PULL OUT
2. Emergency Brake Handle PUSH DOWNWARD


Emergency Evacuation 
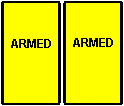
list
1. Stop the aircraft
2. Parking Brake SET
3. Thrust levers CUTOFF
4. If an engine fire is suspected
a. Applicable Engine Fire Handle PULL
b. ARMED Light DEPRESS ONE
c. Other Engine Fire Pull Handle PULL
If engine fire is not suspected:
a. Both Engine Fire Handles PULL
5. Batteries OFF


Engine Failure During Approach list
1. Control Wheel Master Switch DEPRESS AND RELEASE
2. Thrust Lever (operative engine) INCREASE AS REQ’D
3. Flaps 20 MAX
4. Airspeed VREF + 10 MIN


Engine Failure During Takeoff Above V1 list
1. Rudder & Ailerons AS REQ’D
2. Accelerate to Vr Keep nose wheel on Runway
3. Rotate at Vr; Climb at V2
4. Positive Rate GEAR UP
5. Clear of Obstacles V2+30 FLAPS UP


Engine Failure During Takeoff Below V1 list
1. Thrust Levers IDLE
2. Wheel Brakes APPLY
3. Spoilers EXTEND (T/R or D/C Deploy if Necessary)


Engine Fire - Shutdown list
1. Thrust Lever IDLE UNLESS CRITICAL THRUST SITUATION
2. If fire continues more than 15 seconds or there are other indications of fire:
a. Thrust Lever CUTOFF
b. Engine Fire Pull Handle PULL
c. ARMED Light DEPRESS ONE


Fuel Press Light list
1. Thrust Lever RETARD
2. Standby Pump ON
3. Air Ignition ON


Overspeed Recovery - Overspeed Warning Horn  list
1. Thrust Levers IDLE
2. Autopilot DISENGAGE
3. Identify Aircraft Pitch and Roll Attitude
4. Level Wings
5. Elevator and Pitch Trim NOSE UP AS REQ’D
If Mach or Airspeed is severe or if pitch and/or roll attitude is extreme or unknown:
6. Landing Gear DOWN, DO NOT RETRACT


Pitch Axis Malfunction list
1. Control Wheel Master Switch DEPRESS AND HOLD
2. Attitude Control AS REQ’D
3. Thrust Levers:
If high-speed nose-down attitude IDLE
If near stall INCREASE AS REQ’D
4. Both Stall Warning Switches OFF
5. Pitch Trim Switch OFF
6. Autopilot Switch OFF


Roll or Yaw Axis Malfunction list
1. Control Wheel Master Switch DEPRESS
2. Attitude Control AS REQ’D
If control force continues
3. Airspeed REDUCE
4. Affected Axis Trim CB - ROLL or YAW TRIM (pilot’s ESS bus) PULL


Stall Warning Activates list
1. Lower Pitch Attitude to reduce angle of attack
2. Thrust Levers TAKEOFF POWER
3. Accelerate out of the stall condition


Thrust Reverser - Deploy During Takeoff list
1. Emer Stow Switch EMER
2. Throttle IDLE
3. Positive Rate of Climb GEAR UP
4. Clear of Obstacles V2+10 FLAPS UP
5. Maximum Airspeed (until stowed) 125 KIAS


Thrust Reverser Deployment During Takeoff Above V1
With AERONCA T/R’s
list
1. Rudder and Ailerons AS REQ’D
2. Thrust Lever (affected engine) IDLE
3. Emer Stow Switch EMER STOW
4. Accelerate to Vr Keep nose wheel on runway
5. Rotate at Vr Climb at V2
6. Positive Rate of Climb Established GEAR UP
7. Clear of Obstacles ACCELERATE TO V2+30, FLAPS UP


Thrust Reverser Deployment During Takeoff Above V1
With T/R 4000 T/R’s
list
1. Rudder and Ailerons AS REQ’D
2. Thrust Lever (affected engine) IDLE
3. Thrust Reverser Control Switch OFF
4. Accelerate to Vr Keep nose wheel on runway
5. Rotate at Vr Climb at V2
6. Positive Rate of Climb Established GEAR UP
7. Clear of Obstacles ACCELERATE TO V2+30, FLAPS UP
If DEPLOY Lights stay on:
8. Thrust Lever (affected engine) CUTOFF


Thrust Reverser Deployment During Takeoff Below V1 list
1. Thrust Levers IDLE
2. Wheel Brakes APPLY
3. Spoilers EXTEND


Limitations (Specific to Lear 35)  index

Percent   |   Amps   |   Temps   |   Feet   |   Knots   |   Pounds   |   Mach   |   PSI


Increase Landing Distance S.E

1.2

%

N1 or N2 Overspeed 1 Minute to 103%

100

%

N1 or N2 Overspeed 5 Sec to 105

103

%

Generator Output Ground

320

Amps

Generator Output Flight

400

Amps

Max GPU Output @ 28 Volts

1100

Amps

Pressurization goes to Manual Control

8,700

Cabin

Emerg. Press. Valves Open directing Engine Bleed into Cabin

9,500

Cabin

Cabin Altitude Warning Horn

10,100

Cabin

Cabin Altitude Limiters Actuate

11,500

Cabin

Pax Mask not intended for prolonged use above

25,000

Cabin

Crew and Pax O2 Not Approved Above

40,000

Cabin

Fuel Temp

-54

Deg. C

Fuel Temp for Takeoff other than JP4 or equiv

-29

Deg. C

Use GPU

0

Deg. C

Anti-Ice On Ground

4.4

Deg. C

Anti-Ice On Flight

10

Deg. C

Max Oil Temp

140

Deg. C

Recommended Turbine Temp

795

Deg. C

ITT Limits Max Cont

832

Deg. C

ITT Limits Start

860

Deg. C

ITT Limits Takeoff

860

Deg. C

ITT Limits Max Transient

870

Deg. C

O2 Masks Deploy, Cabin overhead panel lights on automatically

14,000

Feet

Intentional stalls with flaps and gear extended not above

18,000

Feet

O2 Masks must be quick donning above

25,000

Feet

Max Operating Altitude

45,000

Feet

A/P Minimum Altitudes Approach

200

Feet AGL

A/P Minimum Altitudes Cruise

1000

Feet AGL

Max Imbalance During Fueling

125

Gallons

When using any AV Fuel in the mix Gal per 100

500

HRS

Max Water/Slush

¾

Inch

Vmcg

103

KIAS

Vmca Sea Level -18c (0 f)

110

KIAS

Max Vref

129

KIAS

Vfe 21-40

150

KIAS

Vfe 9-20

185

KIAS

Vfe 1-8

200

KIAS

Vlo

200

KIAS

Vle

260

KIAS

Airspeed Red Line /Barber Pole 67-670

300

KIAS

Vmo: Up to 8000 Feet

300

KIAS

Vmo if additional Fuselage Fuel (See ZFW Below) cannot be transferred 325 KIAS
Airspeed Red Line /Barber Pole 018-063

350

KIAS

Vmo: 8000 and above

350

KIAS

Max Tailwind

10

KTS

Nosewheel Steering Speed and 2 A/S Lights Inop

10

KTS

Max Nosewheel Steering Speed

45

KTS GS

Max Tire Limit

182

KTS GS

Un-transferable Fuel with Gravity Flow

162

LBS

A/P Fuel Imbalance

200

LBS

Low Fuel

450

LBS

Max Bags in Rear

500

LBS

Minimum Fuel each wing TO or G/A

600

LBS

Soonest can move fuel to wings (Tip Fuel)

760

LBS

Max Tip Landing WT

925

LBS

Aux Hydraulic Pressure

1250

LBS

Normal Hydraulic Pressure

1550

LBS

Approx Useable Fuel

6,238

LBS

BOW SIM

10,500

LBS

Maximum Zero Wing and Tip Fuel Weight
By adding up to 500 lbs additional fuselage fuel...Must be transferred PRIOR to reaching 2250 Total Wing Fuel.
14,000

LBS

Max Zero Wing and Tip Fuel Weight except as above.

13,500

LBS

Max Landing Weight

15,300

LBS

Max Takeoff

18,300

LBS

Max Ramp

18,500

LBS

Max w/o Mach Trim A/P OFF

.69

Mach

Mmo with Mach Trim and Autopilot
Disengaged or left Stall Warning Switch Off

.74

Mach

Mmo with any BLE missing

.78

Mach

Mmo

.81

Mach

Aux Hydraulic Pump Minutes on (20 Min off)

3

Min

Max Water/Slush

19

MM

Max Pressure Altitude for TO

10,000

MSL

Without Emerg Press Valves Wear Masks Abv

41,000

MSL

Max Diff Press

10

PSI

Halon Bottle @ 70 Degrees F

600

PSI

Freon Air Cond (No FCN 89-1) Off Above

18,000

PSI

Freon Air Cond (FCN 89-1) Off Above

35,000

PSI


Approach Planning  (Specific to Lear 35) index

ALTITUDE: Use three times the altitude loss required divided by 1000 to estimate when to start the descent. For example if you have 10,000 feet to loose, you would start your descent 30 miles out.  Add 1 mile for every 10 knots of airspeed reduction. For Example, you are flying at FL410 at 250 KIAS. You want to descend to 5,000 MSL and be at 200 KIAS. 41,000 -  5000 = 36,000 ft. to lose. 36 * 3 = 108 A 50 knt. speed reduction = 5 miles. 108 + 5 = 113 miles out is when you'd begin your descent.

SPEED:  After takeoff, climb at 200 KIAS within the Class D airspace, then accelerate to 250 KIAS to 10,000 then continue climbing at 280 KIAS.  Descend at cruise mach/airspeed until 10,000 then slow to 250 KTS. Slow again to maneuvering speed Vref + 40 prior to the feeder fix, IAF, or final radar vector for the approach (or 10 miles from destination in VMC).  When below 200KIAS call for flaps 8. At some point on the visual approach, you can then slow to 150 KIAS and call gear down, flaps 20 before landing check. At 500' call for landing flaps, and disengage the Y/D prior to touchdown.
In IMC, be fully configured for landing before reaching the FAF. 

TIME TO SEE: (No VDP published) How to Calculate your own VDP with NO Distance Information: On a non precision approach, take your HAT, take away the last number, and subtract that number from your time. Ex. Refer to the NDB or GPS approach for Runway 01 R at Wichita, KS. The HAT is 399 ft. Take away the last number leaving 39  call it 40 Subtract 40 from 1:45. (140 GS time) VDP = 1:06 (1:05)
With Distance Information: Take the HAT and divide it by 300. (314 to be exact) Then, subtract that number from the FAF to the MAP distance. (Along Track Distance) Ex. Refer to the VOR or GPS approach for Runway 14 at Wichita, KS. HAT = 427 ft. 427 / 300 = 1.4 (427 / 314 = 1.359) 8.6 (Distance from ICT to MAP) - 1.4 = 7.2 miles VDP is 7.2 miles from the FAF OR 1.4 miles from the MAP using GPS.
 

MINIMUM MANEUVERING SPEEDS (LR-35)
With Spoilers Deployed     Vref+50
Clean                                    Vref+40
Flaps 8                                  Vref+30
Flaps 20                                Vref+20
Flaps Full                               Vref+10


TFE 731-2 Tips From Honeywell

These tips are for Pilots who operate Turbofan Engines 
index

(Memorize these tips.
They are usually not emphasized
during the initial and recurrent training)
index

ABORT THE START SEQUENCE IF ANY OF THE FOLLOWING OCCUR


Any unusual noise or vibration

Engine does not reach idle within 50 seconds after ITT rise

ITT rapidly approaches maximum start limit (shutdown 50 degrees before
maximum ITT redline to prevent temperature overshoot)

N1 or N2 stop accelerating to idle

N2 Fails to reach 10% in 6 seconds

N2 Fails to rotate

No ITT indication 10 seconds after power lever is advanced to idle

No N1 rotation

No Oil pressure within 10 seconds after ITT rise

No Starter or Ignition disengagement by 50% N2|

index

Additional Lear Jet Training Resources


                                                                                                                            Part 135 Training Resources